Jan 24 2012

Little Blue House Executive Summary

kvincent

So between all of the construction, jobs, career shifting and trying to still maintain some sort of social life, we have failed at updating the blog again last week. Je regret. However, this just means I will try to give a general recap of our progress to date. There will be a lot of changes (more fun/less stressful ones thankfully) in the next few months so at least everyone will be on the same page!

I believe I left off on our saga describing the bathtub journey complete with time lapse. I also believe I ended up not including the final result! I know, quite mean of me but hey, at least you will get an update sooner than 3 months apart :) . The tub itself is a Kohler gray cast iron tub which we loved due to the form, color, and general high quality. I ended up tiling my first shower surround which overall went pretty well. They are 3×6 subway tiles with a glass mosaic band of tile around the middle section to break things up a bit. We love the look but a word of warning, never try to float a thinner tile out to meet the thicker tile’s thickness. Very messy and frustrating to say the least. The step that the tub sits on will be a large format gray tile but we are waiting on a metal bullnose for it. Here are a couple of photos:
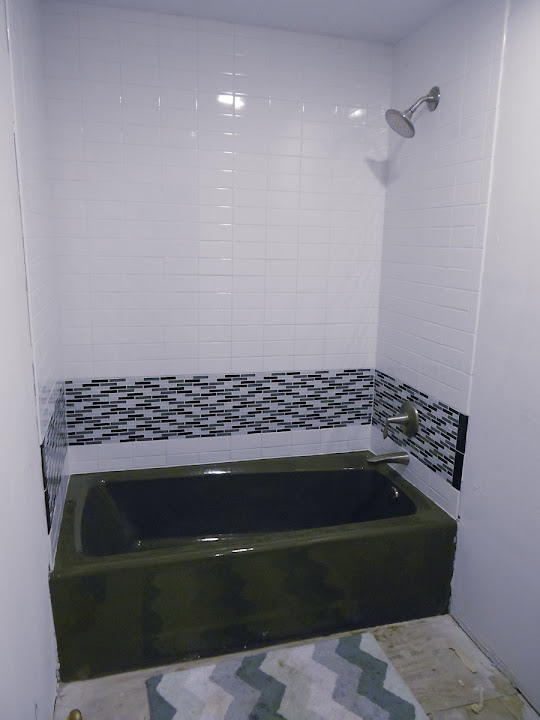
Bathtub alcove with unfinished step! Needs some cleaning up
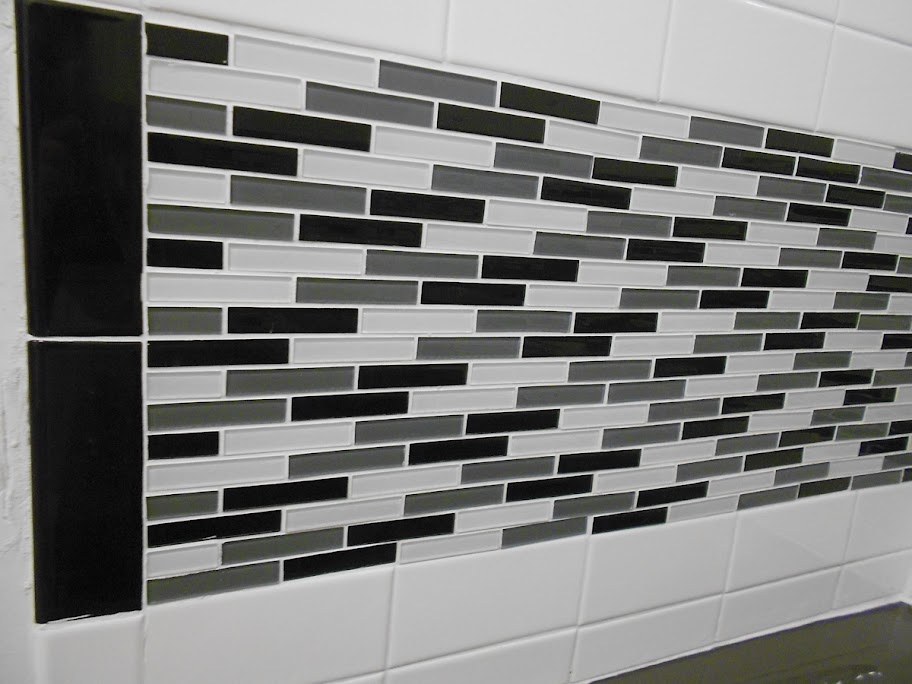
Close up look at the glass tile band. Overall I really like it.

You will notice there is still a bit of cleaning up to do with the tiles/paint/left over tape from trying to protect things but we are happy with it! We chose to go with some brushed nickel Kohler shower and bath fixtures. They should last a very long time.

Nice and clean! Sorry about the white balance issues we are trying out the new point and shoot.

Rainfall head. So nice!

That is about as far as we have gotten with the bathroom so far minus griding down the concrete to prepare it for tile. I think we are going for a retro-modern feel for everything so we have some mosaic subway tiles for that.

Now, on to the rest of the house. It may be obvious by now but we have sheet rock! We hired the downstairs portion of this work due to a lack of time and energy. It took us 4 months worth of weekends to drywall, tape, float, sand and prime everything. 90 sheets of 5/8″ is a bit much for us to attempt again! That being said it was very nice having the pros do everything. They did a great job and will be back for final skim coats right before painting. Also, we have the wood flooring, kitchen tile and kitchen cabinets in! I tell ya, its really coming along.

Floors and walls! This is the living room. The flooring is a light bamboo engineered floor which we love.

The media center will go between those two round sconce boxes on the wall.
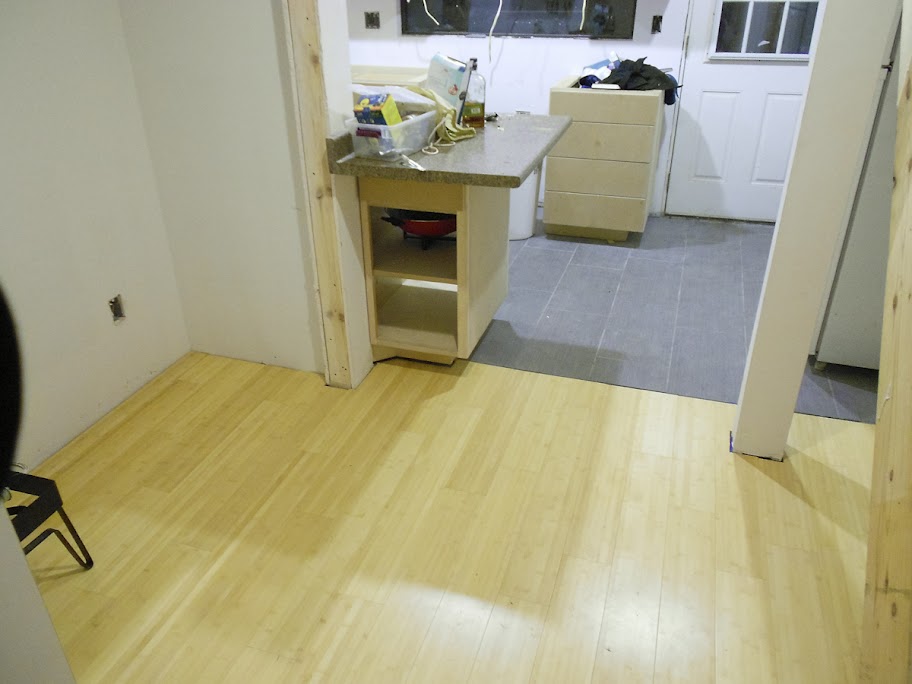
The wide closet to the left is our pantry. The area with the gray tile is the kitchen space. The stairway to upstairs is to the right.

Kitchen cabinets! They will be painted a high gloss red and have butcher block countertops.

Our nice Ikea find! Very solid kitchen faucet.

So there you have it. Our progress in a nutshell. In the next couple of weeks we will be getting a bathroom door, trim installed, painting, kitchen counters and the final bits of tile completed. We plan on keeping a laundry sink in the bathroom until after the refi where we can choose something a bit more permanent to keep our costs reasonable. We are very excited to have a real, functional house soon!

Jan 8 2012

Little Blue House: Episode IV – A New Tub

kvincent

If I could get the text on this thing to scroll and disappear into the distant space horizon I totally would. Alas, being that wordpress has not yet become as progressive as a movie from the 70’s, you will have to deal with witless commentary from someone who is entirely done with the idea of home renovation. No, we are not done with the house; just done with the idea. The upstairs is about 90% completed with flooring, doors, the works. We have not shown pictures yet because we wanted to leave the option for a full length motion picture reveal on the table.

I realize that it has been five or six months since our last blog post but I can assure you that we have a very good reason for that…

Well maybe not a very good reason, but a whole bunch of mediocre reasons.

Things have been a bit crazy for us lately. Last fall we decided to accelerate our house finishing efforts in response to a potential job change for myself as well as being completely fed up with cooking in a toaster oven and a hand-me-down electric wok. In response to that epic decision, we have been going full tilt ever since. I hope over the next week to catch everyone up on about where we are with at all but for this episode of the saga, we prepared a little time lapse video of our bathtub demo-ing efforts! We spare no expense here at LBH Studios. Cinematic gold.

Well, it would be, if there was actually an ending. Decided that moving a 350 pound cast iron tub precariously past an expensive SLR might not be the best of ideas… Maybe the next post I’ll take some photos of the en route to completed bathtub. Without further adieu…

After the demo I realized that the previous owner set all the plumbing fittings too high to set the tub directly on the floor. After a brief freak-out I decided that building a platform for the tub was the only reasonable way to fix the issue just short of demolishing the slab for about two or three feet. Once that was erected my dad and I muscled the 350 pound tub into place and awaited the drywall!

Until then,

Kellan


Jul 10 2011

Our First Beekeeping Video

kvincent

Here is our first video of our beekeeping efforts! I do not have the abilities to color correct or anything yet but its a good place to start!

Little Blue House – First Beekeeping Video from Kellan Vincent on Vimeo.


May 30 2011

Purple Textured Wallpaper Please!

Rebekah
With an extra long weekend, comes extra responsibility… or something like that. Well, I got lucky and didn’t have to work Saturday so we got ourselves in action and spent three days on housework. It was good that Memorial Day allowed a long weekend for sure because we (Kellan) had a big project to tackle. Kellan took on the stairs, which is a later story, and I tackled the laundry list. This list, while tedious, is actually super fun to have because it means we’re close to finishing the upstairs and we can move on with the kitchen!! I did things like priming and painting closets, touch up painting, covering plugs and switches with their covers, prepping the floors for flooring, etc.

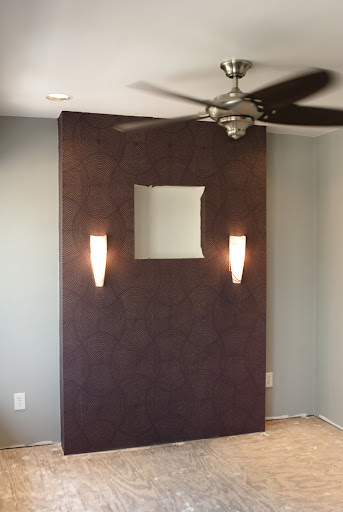
By far, the most exciting thing I got to do this weekend was the wallpaper! Lemme say, I never thought I would be putting up wallpaper in my house nonetheless be excited about said wallpaper. But this stuff is cool :) If you can see in any previous pictures, we have a built-in headboard that goes from floor to ceiling, about 5 ft. wide and 9 in. deep. We decided a while back that we wanted to put a textured wallpaper on the headboard to make it the accent piece of the room and that we wanted it to be purple. These criterium were really hard to find! We had ordered a couple of samples from one place, but one wasn’t the right color and the second had gold sparkles, so we said no. But, the company we ordered from had a 25% sale one weekend, so we took a chance and ordered a couple rolls of one we hadn’t seen. Well, we got the wallpaper and guess what… gold sparkles. With such a COOL pattern though!

The whole headboard
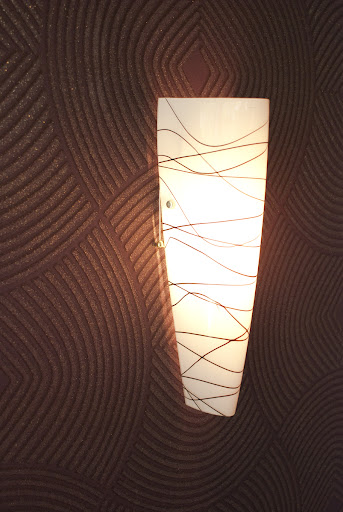
So I put it up this past weekend and we LOVE the effect it has. And I was wrong, at first glance it may look like gold sparkles, but it is actually a gold fiber woven into the design, so no sparkling Kellan and Rebekahs!

It was interesting to put up…. I had never worked with wallpaper before so it made me a little nervous. I’ve seen my mom do it, but if I remember correctly her’s was prepasted and the one we ordered wasn’t. Really though, rolling paste onto the paper isn’t the hard part, but putting it on the wall is (duh?) lol.

Crazy Pattern!

Anyway, it wasn’t too bad once I got the hang of it, but I still seemed to take awhile on it! Which was ok, since I only had other not-so-glamorous things to do :)

Eventually we will add some trim around the outside and upper edge just to clean it up a little bit, but we have to wait for the flooring for that. Also, the white box in the middle of the headboard is a cubby that we’re pretty sure we’re going to line with cedar.

I love this wallpaper! The design of it is sleek and mesmerizing, it is elegant, and it captures your attention. The color adds richness and the texture of it adds dimension. It is the perfect accent piece in my mind.

The close-up


Apr 25 2011

Roy G. Biv

kvincent

So I know this is long overdue but at least we have some pretty stellar news! As the few people who read this blog know, we have been working tediously to finish our second floor. 80+ sheets of drywall and about 12 buckets of compound later, we are pretty much finished minus the closets! We decided to go with a smooth finish and not use spray texture which is usually used to cover up inconsistencies in the finishing or walls. As a result, the finishing process of sanding and touch ups has been incredibly time consuming but we think it will be worth it!

Rebekah’s parents came up a few weeks ago to visit and help us with probably one of the more exciting/fun parts of the renovation thus far. The paint! We used a combo of short knap rollers and quite a bit of tape to create a sleek, modern look. It is all Benjamin Moore Eco-spec which has no VOCs and covers quite well. We went with some bright, punchy colors for the accent walls and two tones of white depending on what colors are used in the rooms. The ceilings are the same sheen and colors as the walls as well, to help everything look nice and clean. Our color theme overall is using primary colors for the downstairs (red, yellow, blue) and secondary colors for the upstairs (orange, green and purple). Yeah, artsy we know :) We took the liberty to use some gray on the walls in order to make things a little more rich feeling. I’ll try to give everyone an idea of the purposing of each room as we go along in the pictures.

This is our office area looking toward the hallway and master door. We plan on bringing the stairs up into this room as well. Eventually we hope to build a bathroom connecting off of this room in order to have a bathroom on the second floor. We already have plans for a few of our photos and artwork that we have been waiting to save so finishing this area cannot come fast enough!

Here is the attic trap door that I made for the crawlspace. I ended up routing out the hinges to make them a little less conspicuous and then rounded out the edges of the door. It will be painted the same color as the ceiling.

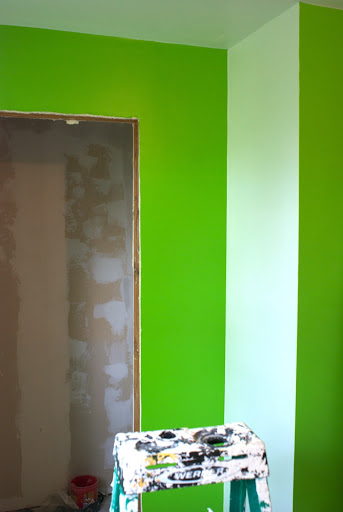
This image shows the guest bedroom/project room/den area with its BRIGHT green accent wall. Rebekah thought I was crazy with the color but I’m pretty sure its her favorite one now :) The windows will be trimmed on the sil only. The rest of it has been drywalled up to the window and caulked to make it clean looking. We definitely like the look. Notice the unfinished closet that should be done soon.

A little bit of fun we had alternating the accent walls with the white. We did a bit of this in the master too (as you will see).

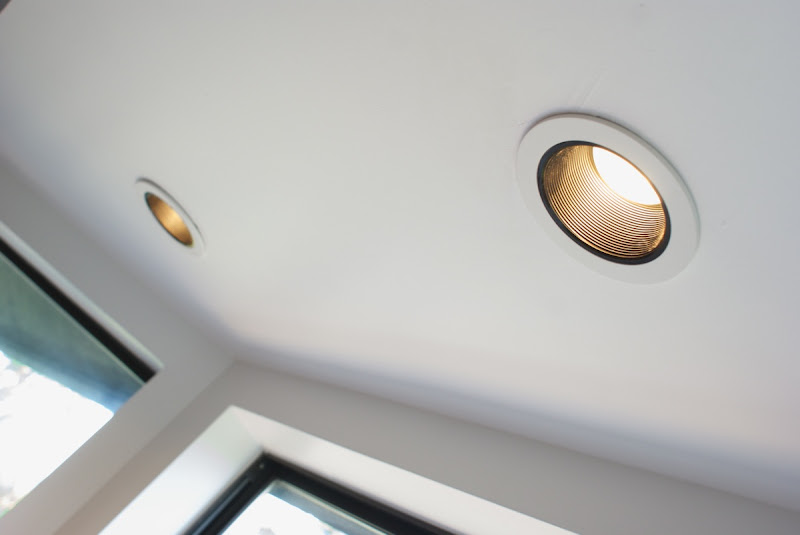
This is one of the can lights in the master bedroom. The trims were a splurge but so worth it. They have a reflective inset that really gives everything a great look .

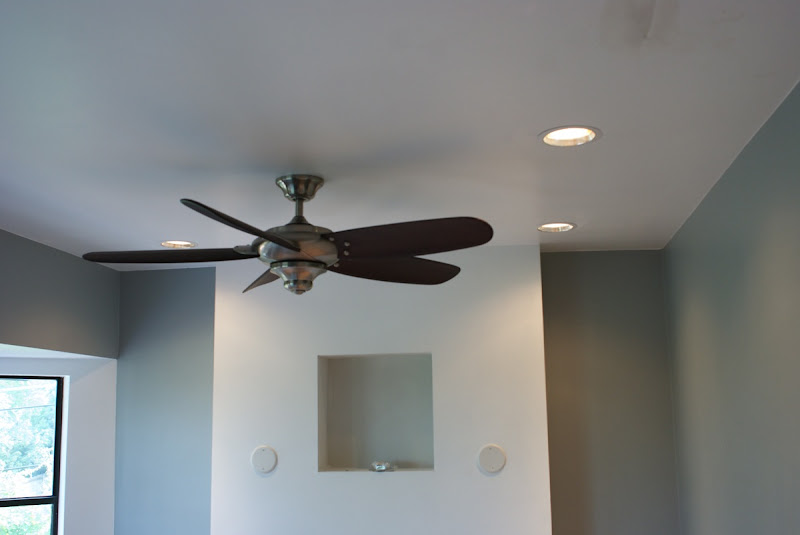
Our master bedroom! At least part of it. The headboard will actually be a purple wall fabric/paper that should have a lot of pop to it. The two round things you see are actually junction boxes for his/her sconces that we will use instead of table lamps. The headboard actually serves as a chase for the plumbing stack and eventually some AC ducting to the downstairs rooms. The fan is remote controlled which is kinda neat despite being a huge pain to install. Do not try to bypass the remote system if you know what is good for your patience :) It will not work.

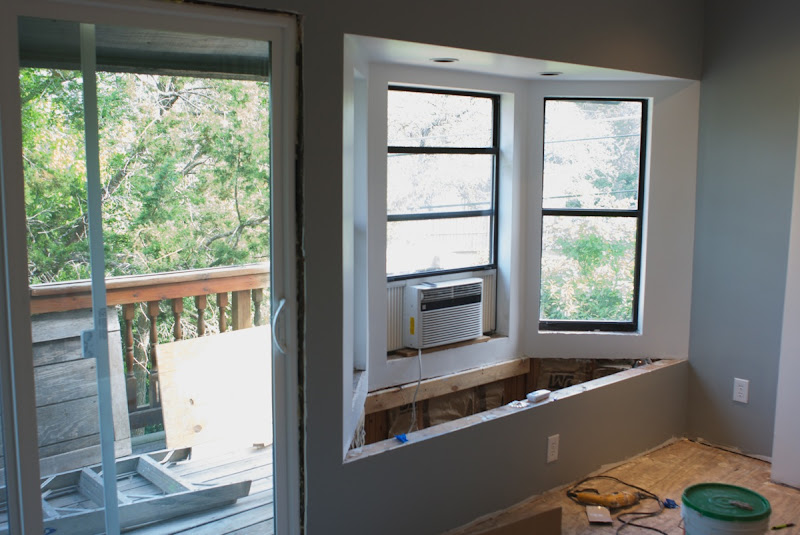
Here is a shot of our beautiful bay window and eventual window seat. We hope to have our carpenter build the framework for it when everything gets trimmed. So much light in this room, especially in the morning…good thing?

These are the can lights inserted within the bay area. Really helps the area stand out at night.

And for our last image, this is the hallway that will eventually have some sort of floating shelf or book case in the end. Originally it was designed to be the entrance from the stairs but that wasn’t entirely feasible. Lots of photos are planned as a gallery area to really make it a space of its own.

That about sums up where we are as far as the upstairs project. We recently purchased some prefinished bamboo flooring that will look incredible once we get it installed. We are extremely eager to start living upstairs and have part of the house actually finished! After the flooring goes in we’ll have everything trimmed and be ready to go with furniture and window coverings. We should have some new posts very soon so keep a look out. Until next time!


Feb 28 2011

Sour Grapes

kvincent

It has been awhile since either of us have commented on the wine making activities so I figured I would give an update! We last left off here in our grape stomping/primary fermenting stages. As some of you may know, wine making is very much about patience. A couple of months after racking to the secondaries, we decided to give it a bit of a taste test. It was delicious – if you like beverages that are face-puckering sour. It is not a total surprise that wine made from juice stomped out of them would be sour as well, but I suppose we thought it would mellow.

Drastic times call for drastic measures. We couldn’t dilute the wine with water anymore due to the fact that it would lose its ability to be stored in the bottles. Dad and I found some grape juice concentrate and decided to mix it into the mustang wine, then pitched a similar yeast into the mix, allowing the newly-mixed sugars to be assimilated. While this helped, it was not nearly enough to combat the acidity of the liquid. My initial test indicated that the wine was roughly 1.4% acidity, over double what we wanted! The dilution dropped the solution down to .9% acidity which was better but still not nearly far enough. I then added potassium bicarbonate as a way to stabilize and bind some of the acid and drop it out of the solution to the bottom of the carboy.

What was the result? Something drinkable! While not the best thing we’ve ever tasted, it had a good flavor (much like the flavor of the grapes). We bottled it in hopes that it may age well. We’ll see in a couple of years?

On a more positive note regarding our little wine making escapades…

Shortly after the mustang wine was first started, I decided to try my hand at making a Mead, which is basically a type of wine made from honey, water, and fruit/flavoring additions if you want to get particularly tricky. Minus the stomping, the process is very similar minus some more technical issues regarding nutrient requirements of yeast varieties which is far too boring for this blog :) .

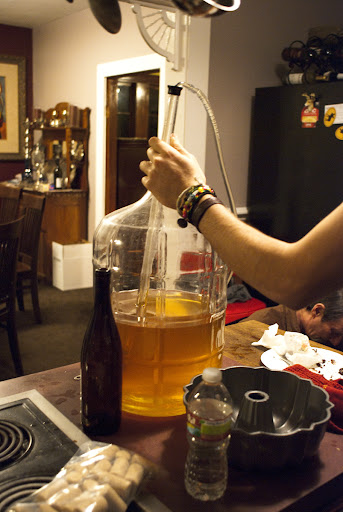
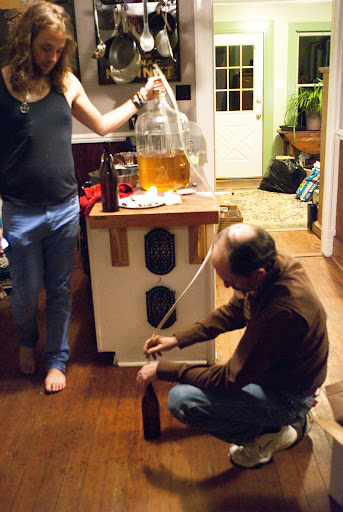
The final result however is quite tasty! While it is still young, it should age quite well over time. The nose on it is absolutely delightful, however the wine itself is very dry (low residual sugar). Here are a few images of us finally bottling the finished product! Notice the golden color and crystal clear liquid. A good sign!

My brother and I getting ready to bottle out of the carboy

Nice honey-colored end result! Bottling ensues!

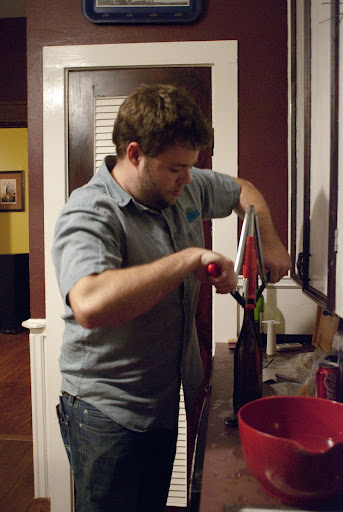
Me trying to figure out how to use the corker. Takes a bit of work!

A family affair!

Now for storage!


Feb 24 2011

The LBC

Rebekah

the Toyota Yaris

Kellan and I must be attracted to the color bright, electric blue because not only did we paint our two sides of our house bright blue, when it came to buying a car, guess what, its also bright blue! It’s a cute little thing! We got our “little blue car” a couple of months ago, so it may be old news to some of you, but it still feels nice and new to us!

We definitely didn’t have it in our “plans” to buy a car so soon after getting married, but my Altima pretty decided to quit working. It would have been great other than the fact that after running some errands one evening, the engine started smokin’! I got out of that car pretty fast that night. Well, Kellan made some valient attempts at fixing it, but alas we had a decision to make. We had recently dumped some money into repairs and if we proceeded to fix the car again, we would have exceeded the value of the car, thus we started to look for a new car.

We came across our little blue car pretty quickly actually! It was the last week of the year so we think we got a good deal on the car, but that’s what the dealers always make you think,right? Oh well! We ended up with a 2008 Yaris with 25,000 miles on it. AND, its fun to drive ! It’s a very small car, but we both actually would say its pretty spacious on the inside. AND, its blue and cute ! I think the mpg is sitting around 35? An extra bonus for sure. I quite enjoy the car and feel very blessed and thankful that we were able to find a dependable car. Its very interesting making “grown-up” decisions as a couple. While our thoughts were more like, “oh dang it, we have to buy a car…”, it was very comforting to know we were doing it together and that we have each other to bounce ideas off of.

I do have to say this though. The one good thing about the Altima was that it was gold. Which meant I didn’t have to wash it because it just really never looked that dirty! So much for that, blue cars do not stay clean! But it is a great color, so I guess I can deal :) !


Jan 14 2011

Dancing with a Water Heater

Rebekah

SO, we know that moving a water heater is dull and uneventful, but we also know that Kellan and Rebekah Vincent moving a water heater is simply the most exciting thing ever! Trust me, we were laughing at every single mishap… yeahhhh. I’d say we (we meaning Rebekah’s muscles) are super good at a lot of the house work we do, but somethings just don’t go right. However I think this one was only 3 trips to Lowes, so that’s pretty good for us!

We decided that the only place for the hot water heater was the attic. It was sitting the the kitchen, but as we need all the space we can get in the kitchen, it had to go. It’s a big tank, and we didn’t have the option of going tankless so, moving it was the only option. The basic idea of the job is that we take the heater out, solder a bunch of copper pipes together to reach the attic, then reconnect the water heater to electricity and the water supply. Sounds simple.

We went to get all our supplies the day before at Lowes, and a nice helpful worker came up to ask what we were up to. We chatted for a bit and he asks:

Lowes Dude: Well! Have any questions for me?

Rebekah: Will we have to come back here this weekend?

Lowes Dude: Yes.

Rebekah: Ohhhh….

I don’t remember the conversation exactly, but that dude was right. Twice over! They hire good people at Lowes!

We got what we thought were all the supplies we needed for the weekend and happily went on our way. We started work the next morning with enthusiasm!!! Kellan drained the tank, disconnected it, etc. So then we tried our hand at soldering. I was in charge of the important task of holding the propane tank while Kellan tried to solder the pipes together, I watched. While watching I realized, “HEY! I know how to do this!” Kellan was skeptical, but psh, I showed him whats what. Mhm. However, the only reason why I knew how to do solder was because I took a jewelry making class in Ecuador where I learned how to solder itsy bitsy pieces of silver together! Kellan was impressed! Either because I actually knew a piece of construction more than he did, or because he didn’t have to solder any more of the 12 joints together! Either way he was proud of me.

While this isn't super good or anything, its pretty good for a non-professional

This is an example of a terrible soldering job! This one I soldered, then it was leaking, so I tried it again, and it ended up looking like this... NOT a good joint!

Back to the comedy…

I did forget to mention that we bought the wrong size pipe the first time around, so that’s why we had to make a second trip to Lowes. The third time was because we messed up a joint so bad we needed more pipe! What a surprise! I honestly don’t know why we haven’t bought stock in Lowes yet…

ANYWAY. To me, the most amusing part of this whole water heater moving experience was when we actually had to haul the water heater from the ground floor, to the second floor, to the attic. Because my muscles were tired at this point, we asked Ross, Kellan’s dad, come over to assist in the lugging around of the water heater. Well first, they tried bear-hugging the water heater up our rickity ladder to the second floor while I stood around and looked pretty. Then they discovered that wouldn’t work. So Ross pulled his handy ratchet strap out of his truck and they tied it around the tank. Then, we discovered we had to lift it up to the balcony first because the ladder was getting in the way. So Kellan got to bear-hug the water heater again. They successfully lifted the tank up to the second floor, but then had the quandry of how to lift it into the attic as the opening in the sheetrock is only 24” x 30” and the tank has a diameter of 24”. As this point I was told:

Kellan: Rebekah, stay away when we’re lifting it up, in case we slip!

Ross: [5 minutes later] Rebekah, don’t get under this while we’re lifting it up.

Well, as they start to lift it up into the attic, the tank swings to the side and I hear:

Kellan, Ross: Rebekah!! Line it up under hole!!!!!

So much for staying out from underneath the thing….

Well, all this to say, we have hot water, and it now comes from the attic instead of the kitchen! YAY!

I know this is pretty self-congradultory, but I had to find some way to make a post on moving the hot water heater interesting! All I did was solder the joints, Kellan did the hard work!

Pipes in the kitchen, running upstairs...

more pipes!

Pipes running up in the 2nd floor closet...

the water heater!

ANDDD Finally in the attic!


Jan 8 2011

Merry belated Christmas!

Rebekah

Happy New Year! I know these are Christmas pictures, but yeahhh, we’re definitely behind on blog posts and it’s catch-up time! So Merry Christmas and Happy New Year to you all.

Early Christmas morning!

We had a wonderful first holiday season together and we’re looking forward to more. Christmas was a very different time for both of us I think. It was a little odd because before we were married of course we did what our families did, and now having our own family, we got to make our own Christmas! It is odd though! You just get so used to doing things one way and then its not there all the sudden. I’m not complaining or anything and Christmas was wonderful; simply reflecting back on that time makes me think about the switch that happened! We had a very fun and exciting first Christmas together with friends and family!

One of my favorite things we did was find our own Christmas tree! Austin is full of cedar trees which look close enough to Christmas trees if you ask me. Soooo we snuck out in the dark, found the perfect tree, cut ‘er down and dragged it home! Haha, really the tree was on our property so we didn’t have to go too far! We did get a strange look from a neighbor walking by though…. I really loved our tree. It was very home-y and with Kellan’s excellent pruning skills, he shaped it too look just right! Since we’re living in just a couple of rooms in the house right now, we set the tree up just a few feet away from our bed and I really liked laying in bed at night and looking at the lights! I wouldn’t mind cutting down another cedar next year to be honest! We were joking though that next year we should find one of the pre-decorated ones along the road… Austinites have a tradition of decorating random Christmas trees with balls and ribbons along certain roads, and I love seeing them every year!

Cedar trees get a facelift

So that was some of our first Christmas together! We didn’t have an angel or star to put on top of the Christmas tree so we put a stuffed animal up there Kellan gave me a while back, I think its cute, untraditional, but cute! And of course, here is our complete family picture with our nutter of a cat.

Us with Oso

We’ll be updating more very shortly, so look for things like “bear-hugging the waterheater up to the attic” and “who is the better solder-er in the vincent household???” and “LBC” (hint: we say LBH to shorten saying Little Blue House) and maybe a “virtual” tour of the house soon! Thanks for reading, hope you all have a wonderful 2011 (WHOOP!).


Dec 17 2010

We Have Walls?!

kvincent

Yeah I know we were pretty shocked at the sight as well! Rebekah and I have been very hard at work installing drywall throughout our second floor. ~64 sheets and many many weekend/weeknight hours later and we have a pretty big success! Currently everything but one of the bedroom closets and a bit of trim work around the windows is complete. This is a very exciting achievement.

While I do not think that hanging drywall would be a viable alternative career choice for either of us (read: our first room came out a bit rough…) we definitely did well enough to have a beautiful result when everything is complete!

Some of our recent drywall lessons:

•5/8 fire rated sheetrock has fiberglass hairs within the gypsum which becomes INCREDIBLY itchy by the end of the day.

•A materials lift (think mechanical forklift) is absolutely necessary to lift heavy materials to the top of a balcony. Brute force is not the answer on this one…

•For ceilings, spend the 40 bucks and rent a sheetrock lift. Your shoulders will thank you.

•Wooden framing is RARELY straight so be ready to figure out how to make the walls look it when you try to hang the drywall…

•Hanging drywall never seems to end

•Measure twice, cut once, shave high spots 3 times seems to be the rule…
Despite all these fun learning experiences, both Rebekah and I managed to get the hang of it and get it done! We decided to hang the panels vertically in some areas due to some of the layout problems and to minimize the amount of butt-joints that we would have to tape and float in the finishing. Probably a good idea…
We also have been finalizing materials and design options for the kitchen renovation. We are incredibly excited with the way its turning out. Maybe I create a post for everyone to see some concept renderings I have been doing!
Anyway we’ll have at least one more follow up post soon to come regarding a couple of other changes going on in the Little Blue House. Plumbing? Hardwood flooring? Some exciting stuff coming up so keep in touch!
A few of our pictures :)

Our materials lift towering over the landscape!

So worth the rental. Crank it up and drag the sheets onto the deck!

Our headboard/chase for the plumbing in the master bedroom!

Side of headboard and bay window (all sheetrock)

Bay window and patio doors. Starting to take shape.